

Ready to get the ultimate glow? Whether you're going full glam or just want a subtle shimmer, highlighter is the secret sauce to a glowing makeup look. Knowing where to apply highlighter is among the most useful makeup techniques you can learn – especially if you favour glowy or dewy looks.
Highlighter, as you probably already know, can help brighten your face, draw attention to your favourite features, and give your skin a “just-got-back-from-holiday” luminosity – think sculpted cheekbones, lifted brows, and a luminous finish that catches just the right light.
Highlighter isn’t one-size-fits-all either. From silky powders to dewy creams and glossy liquids, there’s a highlighter for every look. Whether you’re going for glazed-doughnut shine or barely-there brightness, mastering how to use highlighter can help you serve all kinds of looks.
But let’s be real – learning how to put on highlighter can feel like a mystery if you’re not sure where to start. That’s where we come in. Here, we’ll teach you how to apply highlighter like a pro, with nine tips to enhance your natural features and dial up the lit look.
What is Highlighter and What is its Purpose?
Highlighter is the ultimate glow-booster in your makeup kit. It’s a light-reflecting product designed to enhance your features by adding radiance to specific areas of your face. Whether it’s a soft shimmer or full-on shine you’re after, highlighters come in all kinds of formulas – powder, cream, or liquid – so you can find your perfect glow.
Highlighter makeup most commonly comes in shades like gold, bronze, and silver, though you can find more colourful options too – we’re especially fond of how shimmery pink highlighter looks when blended with blush.
So, how do you use highlighter makeup? Use a fluffy brush for powder, your fingertips for cream, or a sponge for liquid to blend and build that glow. This creates a lit-from-within finish that instantly lifts and brightens, giving you a youthful, fresh-faced vibe with zero filters needed.
Key Areas to Apply Highlighter for Maximum Impact
If you ask a pro, “Where do you put highlighter?” they’re likely to respond with the advice to put it on the high points of your face. But where are the high points of the face? We’re here to clear that up. We’re revealing exactly where to apply highlighter for a glowy makeup look.
1. The tops of your cheekbones
Perfect highlighter placement starts with your cheekbones. A dusting of shimmer can help “lift” your features and make your cheekbones pop (especially when paired with contour). We recommend using contour to draw a line along the hollows of each cheek, then using highlighter to draw attention to the top of your cheekbones.
You can use our WONDER™ STICK CONTOUR AND HIGHLIGHTER STICK for both – one end of this dual-ended contour stick boasts a pigmented cream contour, while the other side has a cream highlighter for brightening and illuminating. It comes in eight colour-coordinated shade pairings and blends beautifully with a sponge or brush.
2. Down the bridge of your nose
The bridge of your nose is the highest point of your face – it’s the first place light hits when you’re in the sun (which is why freckles tend to appear there in the summer). To give your makeup a naturally glowy finish, lightly sweep pearlescent highlighter makeup along the bridge of your nose, stopping short of the tip.
3. On your cupid’s bow
You can fake a fuller pout by lining your cupid’s bow with a reflective highlighter. Use a highlighter pencil, like WONDER™ PENCIL MICRO HIGHLIGHTER PENCIL, to trace the “v” along the top of your lip. This dual-ended pencil includes two colour-coordinated shades—one matte, one shimmer—and is ideal for precision detailing work. After highlighting your cupid’s bow (and blending it out for a seamless finish), coat your pout in a reflective lip gloss for added shine.
4. On the inner corners of your eyes
Skimping on sleep doesn’t have to ruin your makeup look. You can brighten up your eyes and fake a wide-awake look by placing a bit of highlighter around the inner corners of your eyes.
Bonus: Applying highlighter here can also make your eyes look bigger.
Pro Tip: Adding highlighter to your inner corners can help balance and soften a bold smokey eye look. Just pat a small amount of highlighter onto the inner corners of your eyes and blend with the rest of your shadow for a seamless finish.
5. On the center of your eyelids
When it comes to eye makeup, highlighter may not be the first product that comes to mind. However, applying a bit of shimmer to the center of your lids can help make your eyes look bigger, brighter, and more alert.
6. Along your brow bones
Like your inner corners, highlighting your brow bones (the skin immediately underneath your arches) can help visually lift your brows and make you look more awake. Just be careful not to overdo it: The goal is to add a hint of luminosity, not gild your brows (unless that is your goal, in which case, have at it!).
7. The centre of your chin
If you have oily skin, you may be wary of putting highlighter on your T-zone – the assumption being that shimmer will make your skin look more oily. While that can be true, highlighter on your chin can help draw attention to the centre of your face for a balanced look.
The trick: Use a matte highlighter, rather than one with shimmer, if you want to emphasise your features without shine (the concealing end of our WONDER™ PENCIL MICRO HIGHLIGHTER PENCIL is ideal for this).
8. Along your hairline
Adding just the smallest hint of highlighter along your hairline at the very top of your forehead can help add dimension to your face and keep your look from falling flat. Just be sure to use a light hand and blend well—a little goes a long way.
9. On your collarbones
Highlighter makeup doesn’t have to just be for your face: You can also apply highlighter to your body. If you’re wearing something that exposes your décolleté, dust a little bit of powder highlighter along the very top of your collarbones to make them pop. You can also mix a liquid highlighter into your body lotion for a subtle, all-over glow.
How to Apply Highlighter: A Step-by-Step Guide
Now that you know where to apply highlighter, we can cover how to apply it. Keep in mind that this varies depending on the formula you’re using (as well as your desired effect). Here, we’re breaking down five steps for a perfect glow, every time.
- If subtle luminosity is what you’re after, cream formulas are the way to go.
- For medium shine and shimmer, try a liquid formula—they can range in intensity from subtle to super-charged.
- And if you’re all about that glow, opt for a high-shine pigmented powder formula—typically, these will provide a more glam, metallic effect.
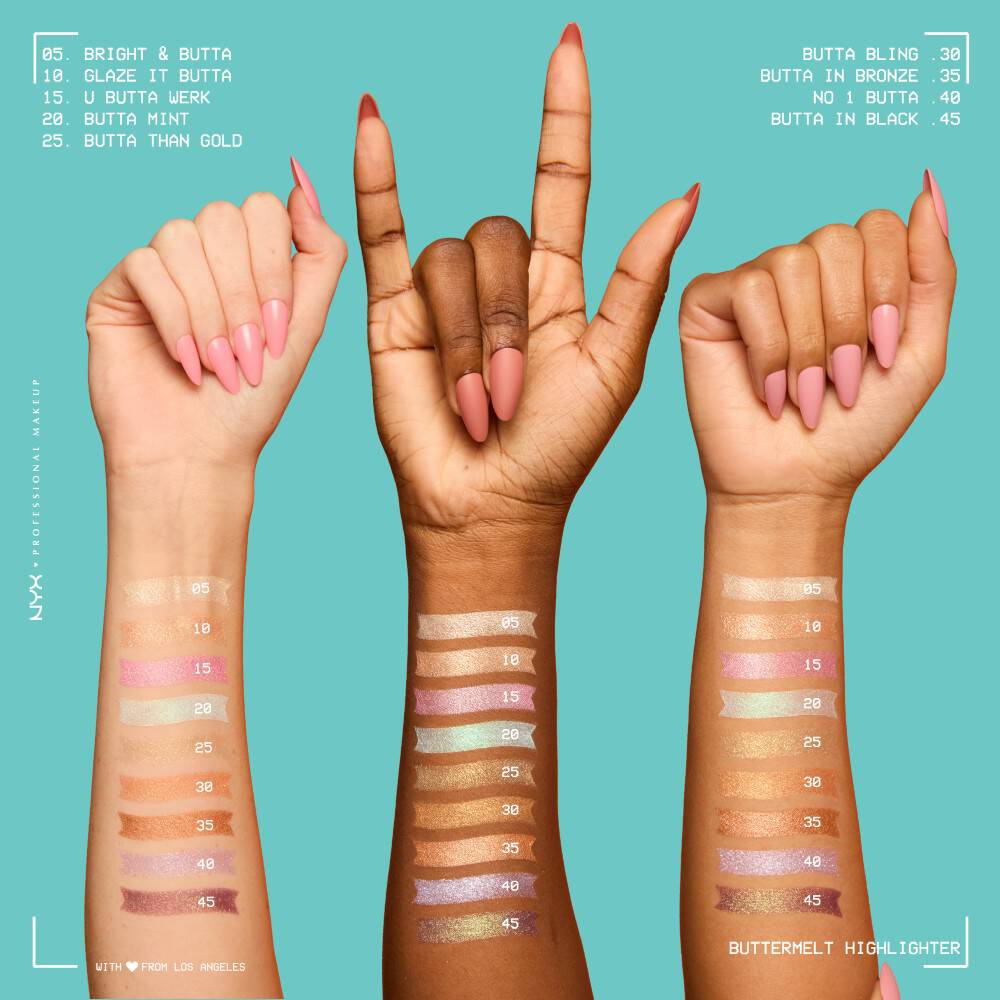
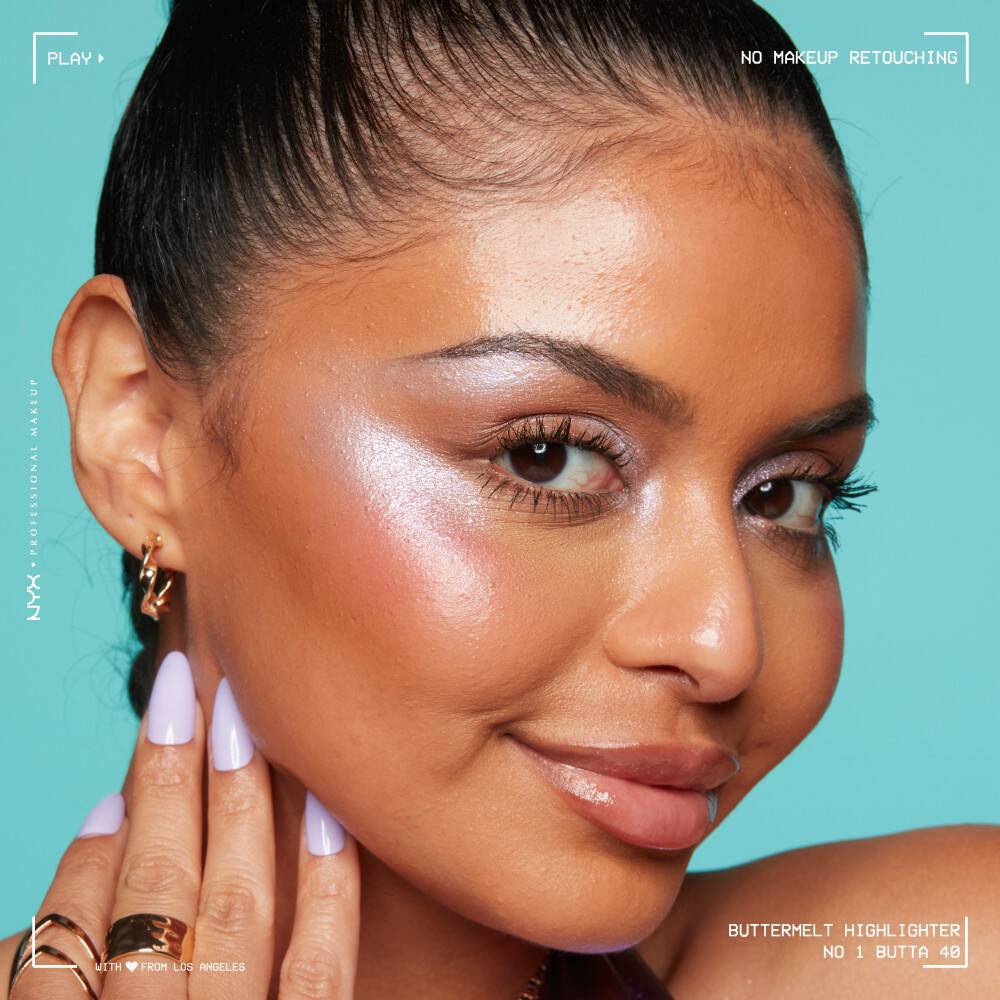
- If you have cool undertones, look for a highlighter with silvery undertones; those with warm skin will do best with golden-flecked highlighters. The Buttermelt Highlighter No 1 Butta is the perfect match for it.
- For anyone with neutral undertones, you’re in luck – both cool-toned and warm-toned highlighters will complement your skin. In that case, we recommend the Buttermelt Bright & Butta.
Step 1: Find the right shade and formula
It kind of goes without saying, but it’s important to choose the right highlighter for your needs.
Which type of highlighter is right for you?
What highlighter shade should you choose?
Likewise, picking the right shade is crucial. For a natural-looking glow, you want something that flatters your skin tone:
Step 2: Prep your skin
Once you’re ready to start working on the masterpiece that is your makeup look, start by prepping your skin with a makeup primer. In addition to helping increase the wear of your makeup, the right primer can help address concerns like dry skin, large pores, and fine lines.
Step 3: Apply your face makeup
After prepping your skin, continue with your routine by applying foundation and concealer, if desired. Then, add colour back into your face with blush – this will help tie together your glowy look. After applying your foundation and blush, it’s time to apply highlighter.
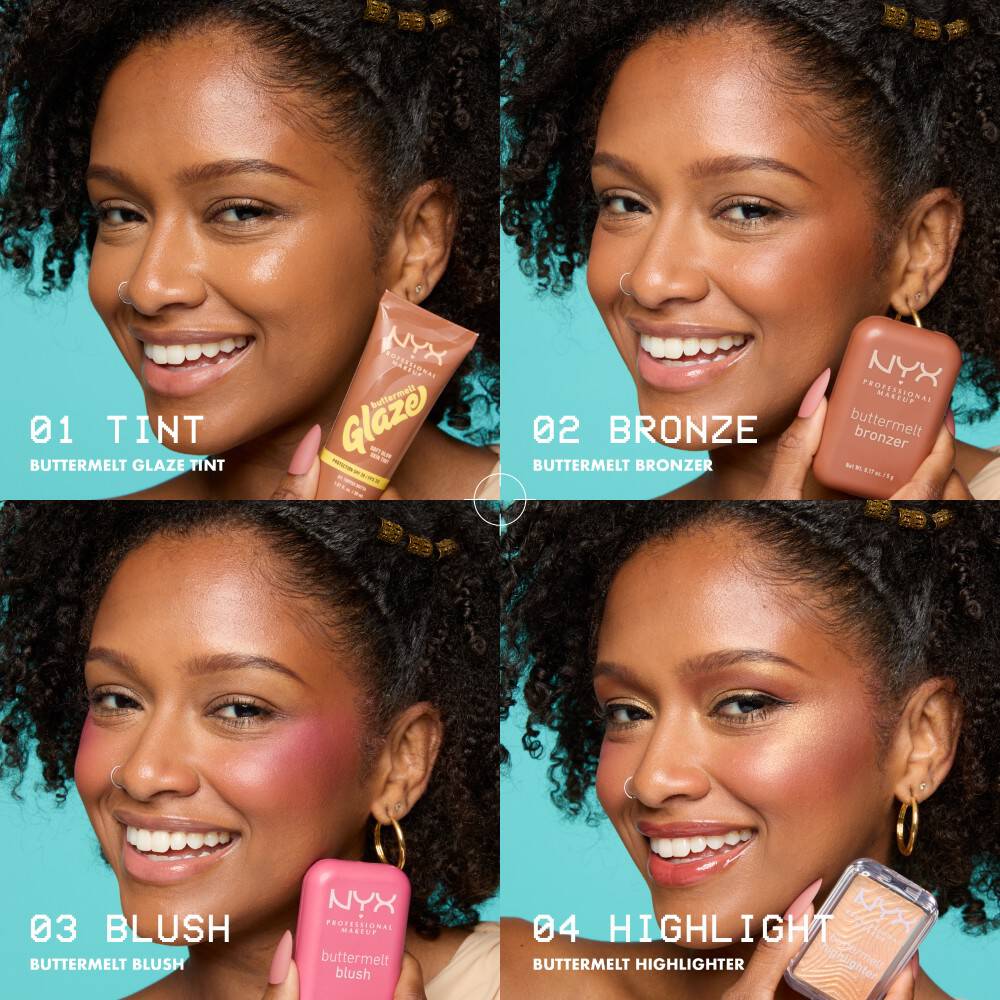
If you’re using a cream highlighter, we suggest pairing it with a cream blush, such as our Buttermelt Blush. Like the aforementioned contour stick, this pigmented formula includes two coordinating shades for a natural flush of colour. You can use the colours separately for a more subtle look, or use your blush in lieu of contour (with the darker shade taking the place of your typical contour makeup) for a sculpted look.
Powder highlighter, meanwhile, pairs best with powder makeup. Add a flush of colour to your cheeks with our silky-smooth Buttermelt Blush, and, if desired, dust a bronzer (like our Buttermelt Bronzer) onto your temples and hairline for a super beachy bronze.
Step 4: Brighten up your look with highlighter
Next, apply your highlighter to the areas outlined above, using your preferred tool – whether that be a brush, a sponge, or your fingers (or a combination of the three).
We suggest using a light hand when applying your highlighter, as you can always add more, but you can’t really take excess shimmer away without needing to touch up your base makeup.
Step 5: Add any finishing touches
Complete your makeup routine and lock your look in place by spritzing your face with a setting spray.
We want to see you get your glow on. Now that you know how to apply highlighter like a pro, share a picture of your favourite highlighter looks on social media, and tag us @nyxcosmetics_uk
Combining Highlighter with Other Makeup Products
If you want to really up your glow game, it’s all about the golden trio: blush, bronzer, and highlighter. When used together, they sculpt, warm, and light up your face for a flawless, dimensional finish.
Wondering how to use bronzer and highlighter together? Knowing the right order is key:
-
1. Start with bronzer to add warmth and definition—think cheekbones, jawline, and forehead.
2. Then, pop on blush to bring a flush of colour to the apples of your cheeks.
3. Finish strong with some glow: strategic highlighter placement on the high points of your face (cheekbones, nose, brow bone, etc.) to catch the light and complete the look.
FAQs
- Cheekbones
- Brow bones
- Bridge of the nose
- Cupid’s bow
- Inner corners of the eyes
Where do you apply highlighter on your face?
Apply highlighter to the high points of your face for a radiant, lifted look:
How do you apply highlighter for a natural glow?
Use a light hand and blend well. Tap or sweep a small amount of highlighter onto key areas using a brush, sponge, or fingertips for a soft, lit-from-within finish.
What’s the best way to use Buttermelt highlighter for highlighting?
Swipe the NYX Buttermelt Highlighter onto the desired areas and blend with your fingers or a sponge. Its buttery texture melts into the skin for a seamless, dewy glow.
Can I use bronzer and highlighter together?
Absolutely! Apply bronzer to contour and warm the face, then follow with highlighter on high points to add dimension and glow. They’re the dream team for a sculpted, radiant look.


